
|
Overview The Actions module has two tabs: Onboarding Hub and Comms History. The Onboarding Hub guides you through the recommended steps to finish setting up Montro, with a progress tracker showing how far along you are. Comms History is a log of every notification sent to users from within Montro - for example, breach alerts triggered from the Security module, so you have a full record of what was sent, to whom, and when. |
Accessing Actions
To get to the Actions section in Montro:
- Go to app.montro.io/login and sign in with your Montro credentials.
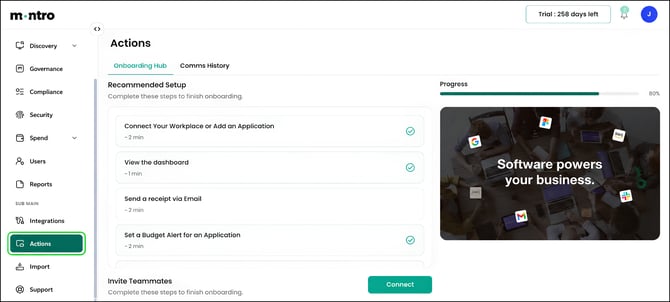
- In the left-hand navigation, scroll down to Sub Main and click Actions.
- Use the tab bar to switch between Onboarding Hub and Comms History.
Onboarding Hub
The Onboarding Hub tab appears when you first open Actions. It shows the Recommended Setup checklist and your overall onboarding progress.
Progress: A progress bar in the top right of the tab shows the percentage of setup steps completed. Steps that have been completed are shown with a green tick. Steps still to be done are listed without a tick and show an estimated time to complete.
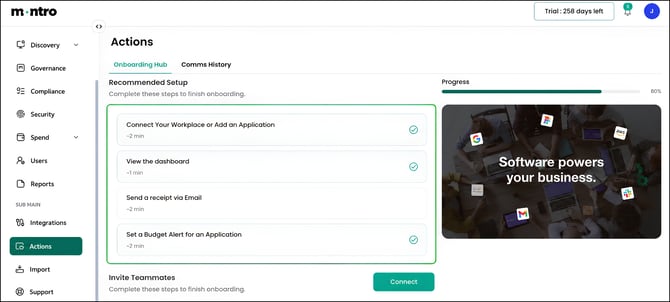
Recommended Setup: The Recommended Setup section lists the key steps Montro suggests completing to get the most out of the platform. These are not mandatory but represent the fastest path to a fully working environment.
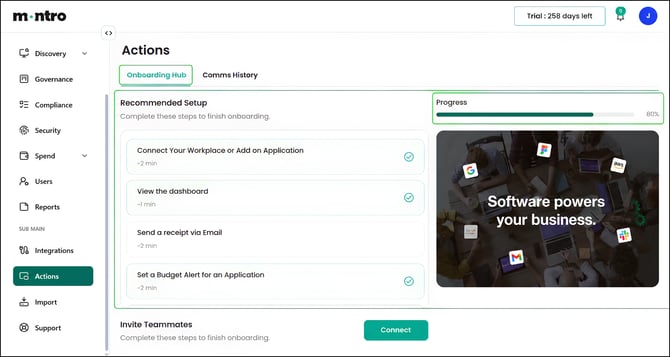
The steps visible include:
- Connect Your Workplace or Add an Application - connect an integration such as Google Workspace, Microsoft Entra ID, or Okta to start discovery.
- View the Dashboard - familiarise yourself with the main overview screen.
- Send a Receipt via Email - forward a vendor invoice or receipt to Montro to start populating spend data.
- Set a Budget Alert for an Application - configure a spend threshold alert on an application.
- Assign a Licence to a User - link a licence record to a specific user in your organisation.
- Add a Vendor Contract with a Custom Field - create a contract record and add a custom data field to it.
- Configure Notifications and Connect Slack - set up alert notifications and connect Slack as a notification channel.
- Link Accounting (Ramp) or Add a Payment - connect a payment source or manually add a payment record.
- Import at Least One Entity - use the Import feature to bring in data from a CSV or external source.
- Contact Support - reach out to the Montro support team with any setup questions.
|
Tip The fastest way to reach 100%. If your progress bar is already showing 80% or above, check which steps remain unchecked. The most common outstanding steps at this stage are Send a Receipt via Email and Add a Vendor Contract with a Custom Field, as these require data your team may not have entered yet. |
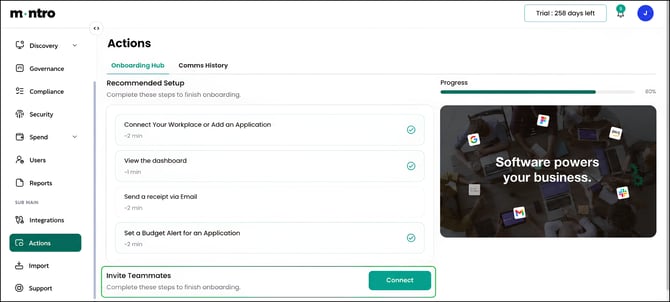
Invite Teammates: At the bottom of the Onboarding Hub, there is an Invite Teammates section with a Connect button. Use this to invite colleagues to Montro so they can access the platform alongside you. This is particularly useful for bringing in team members who will own specific areas - for example, a DPO managing the GDPR RoPA tab or a finance lead managing Spend.
Comms History
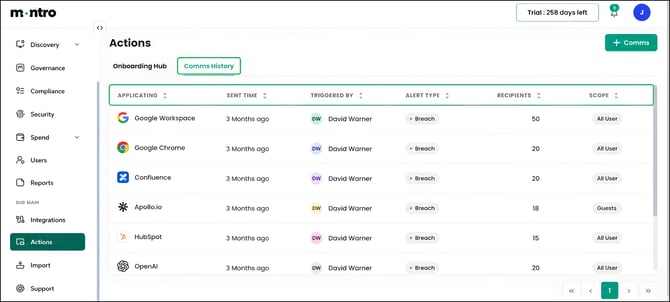
The Comms History tab is a log of every communication sent to users from within Montro. At the top right of this tab, a + Comms button lets you create and send a new communication directly from here.
Each row in the table shows:
- Application - the application the communication relates to.
- Sent Time - when the communication was sent, shown as a relative time such as 3 Months ago.
- Triggered By - the Montro user who sent or triggered the communication.
- Alert Type - the category of communication. Breach indicates the message was a breach notification, triggered from the Security module using the Nudge function.
- Recipients - the number of users the communication was sent to.
- Scope - who the communication was targeted at. All User means it was sent to all users of that application. Guests means it was sent only to guest-level users.
|
Tip Use Comms History to confirm Nudge notifications were sent. When you use the Nudge button in the Security module to alert users about a breach, that communication is recorded here. If you need to confirm a notification was delivered - for audit, incident response, or internal reporting purposes, this is where to check. The Triggered By column shows who sent it and the Recipients column shows how many users were reached. |
Sending a New Communication
To send a communication to users directly from the Actions module:
- Click + Comms at the top right of the Comms History tab.
- Select the application and the users or scope you want to reach.
- Draft your message and send.
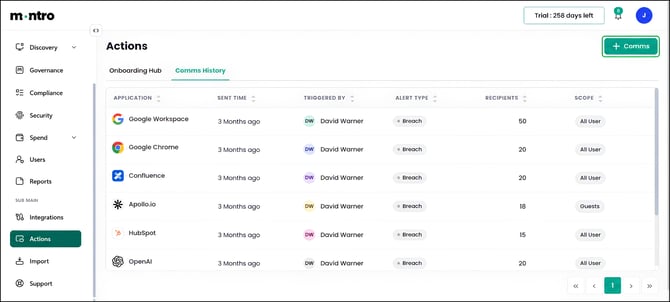
The communication will appear in Comms History once sent.
Best Practices
- Work through the Onboarding Hub checklist early - the steps are ordered to give you value as quickly as possible, and each one unlocks more complete data across the rest of the platform.
- Invite teammates before you finish setup so they can complete the steps relevant to their role, rather than one person completing everything alone.
- Check Comms History after sending any breach notification from the Security module to confirm it was logged and the recipient count is as expected.
- Use + Comms when you need to reach users about an application outside of a breach event - for example, to notify them of a policy change or an upcoming renewal that affects their access.